Raise your hand if you’re a parent that bought an expensive DSLR camera when their kid was born, only to have it collect dust as you use your phone to take all those monthly photos of the little one.
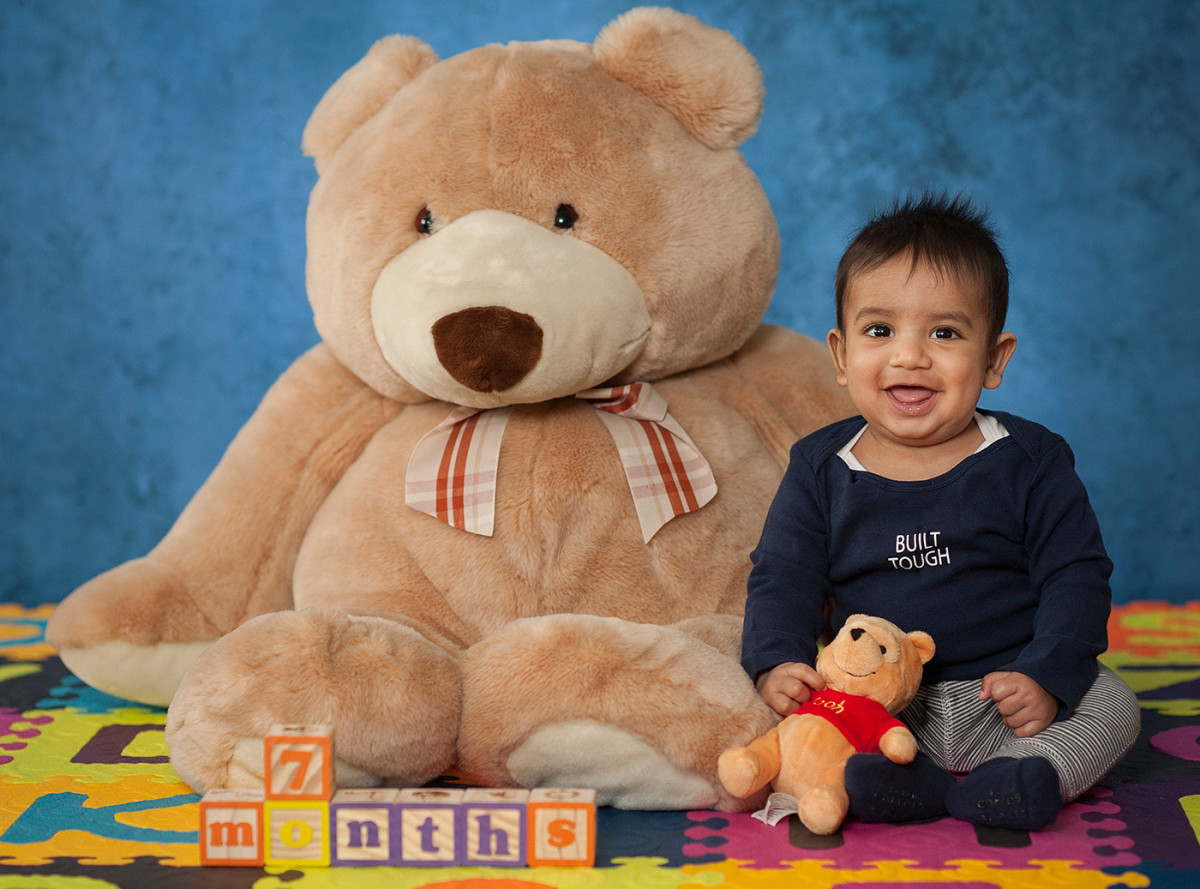
Well here’s an excuse to dust off the DSLR – because you can probably get pretty close to what I do each month for my son (see above) with just a little extra effort. It’ll be far better than the sticker-on-the-chest couch picture with your cell phone. (sorry if that’s you … but I’m here to help! Click below to learn more)
Tip #1: Use something for scale
Kids grow fast, but if they’re just sitting in an empty space, there’s nothing to give a sense of scale. We used a rather large teddy bear and the very standard wooden blocks as a device to chart the son’s growth over the year. Another friend used a stuffed horse that her son would ride in the photo.
If you’re being literal, there’s always a ruler too. Pick something and stick with it month to month, and you’ll be amazed at how fast the little one grows.
Tip #2: Take lots of photos
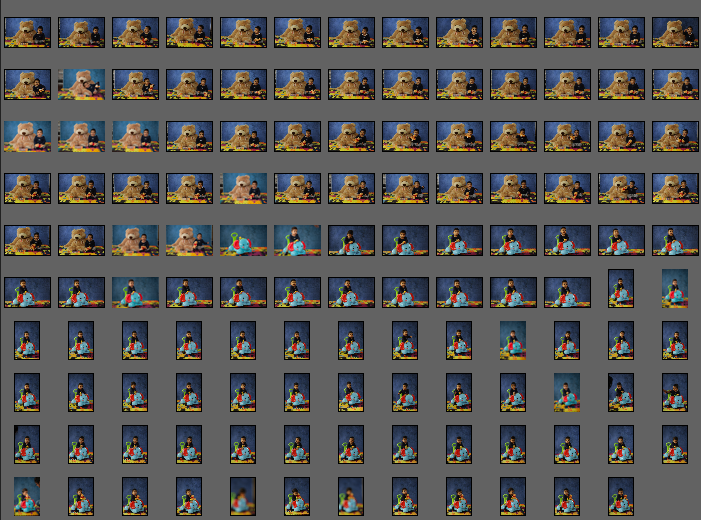
In a typical monthly photo shoot, I shoot 150 or so photos just to get the 3 or 4 that eventually see the light of day. You can see this in the RAW take to the left that’s showing all the photos from that particular session. Maybe in one photo his eyes are closed. In another there’s a big wad of drool forming at the mouth. In still another he’s giving me the finger. Capturing that “perfect” moment is easier when you give yourself more chances.
Tip #3: Use available light … And that means any available light
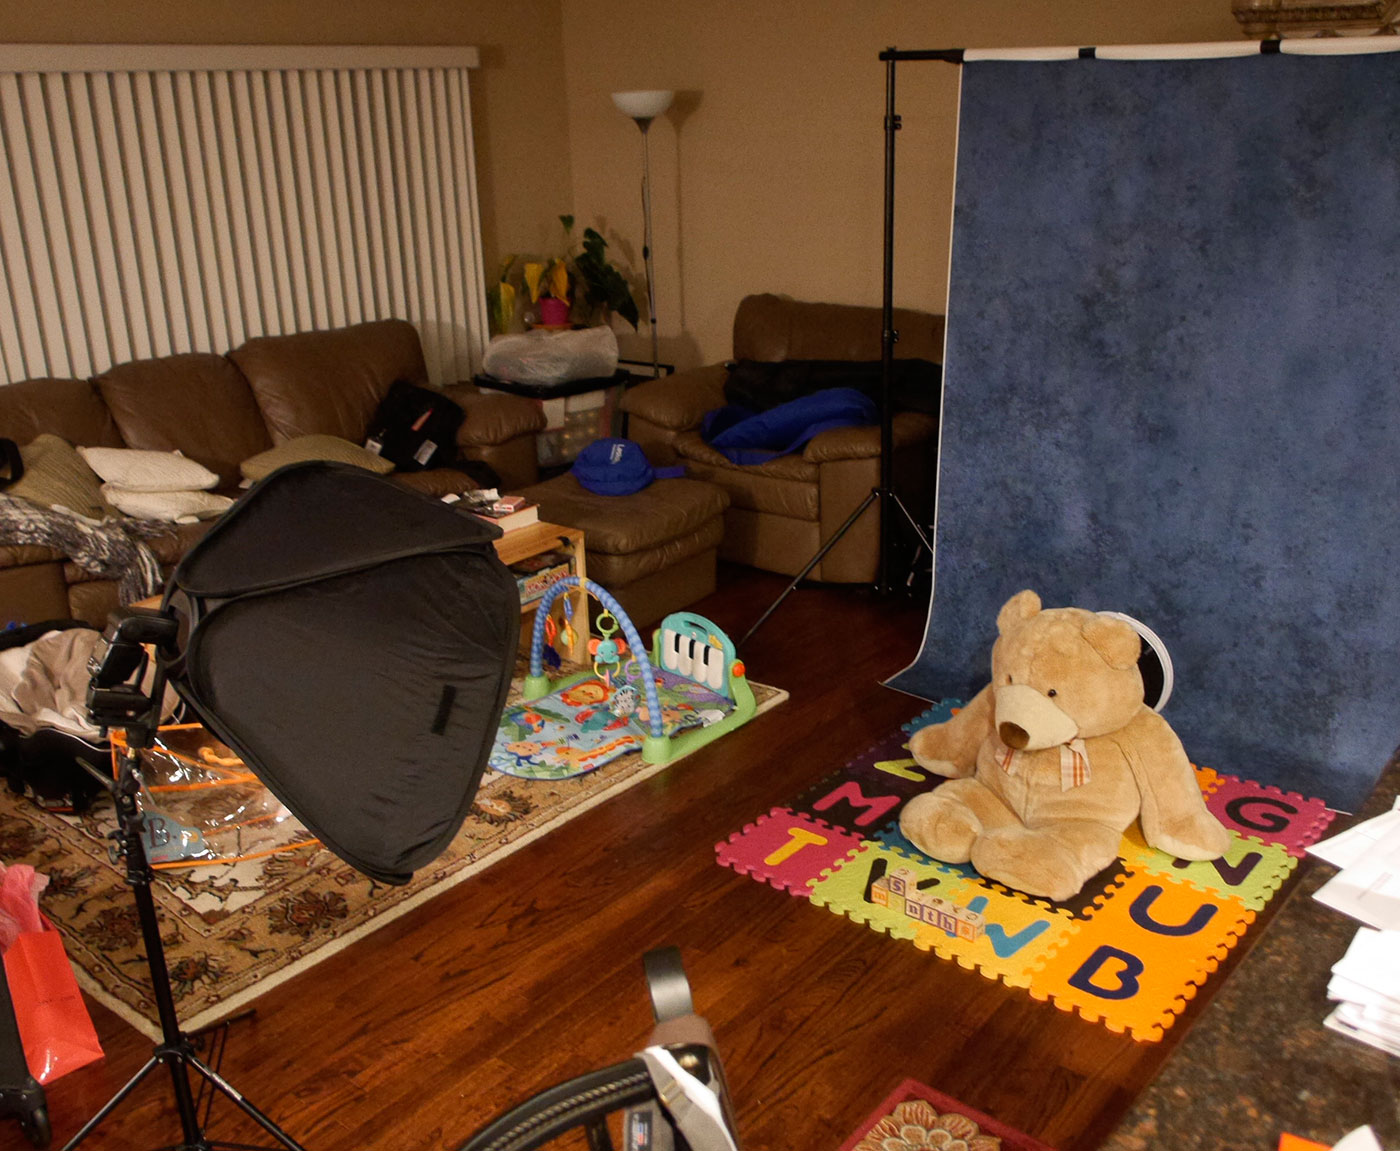
Here’s my setup, in all its glory – a messy living room. You’ll notice a flash at the back of a softbox (the big black box on a stand), a backdrop on stands, and another light behind the bear.
The key to all of this is the main light – the flash in the softbox.
Why am I using a light when I have perfectly fine windows in my living room? I’ll quote photography great Joe McNally from his book, The Moment It Clicks (where he is paraphrasing from a speech by LIFE photographer W. Eugune Smith):
“‘Mr. Smith, is the only good light available light?'” came the question.
He leaned into the microphone. ‘Yes,’ he baritoned, and paused. A shudder ran through all of us. That was it! No more flash! God’s light or nothing! But then he leaned back into the mic, ‘By that, I mean, any &*%%@$ light that’s available.’ Point taken.”
That small flash I’m using is available light – in that I bought it and made it available to me. If you’re not using some sort of lighting, you’re limiting what you can do, because most lighting in a living room isn’t going to cut it for an image. If you’ve used your cell phone to try and take pictures of a moving child indoors, you know what I mean.
Using a light helps in a number of ways – it freezes a squirrely kid beyond what the camera can do on its own without flash. Bounced off a ceiling or wall, or used in a softbox here, it can create nice, even light that’s perfect for kids.
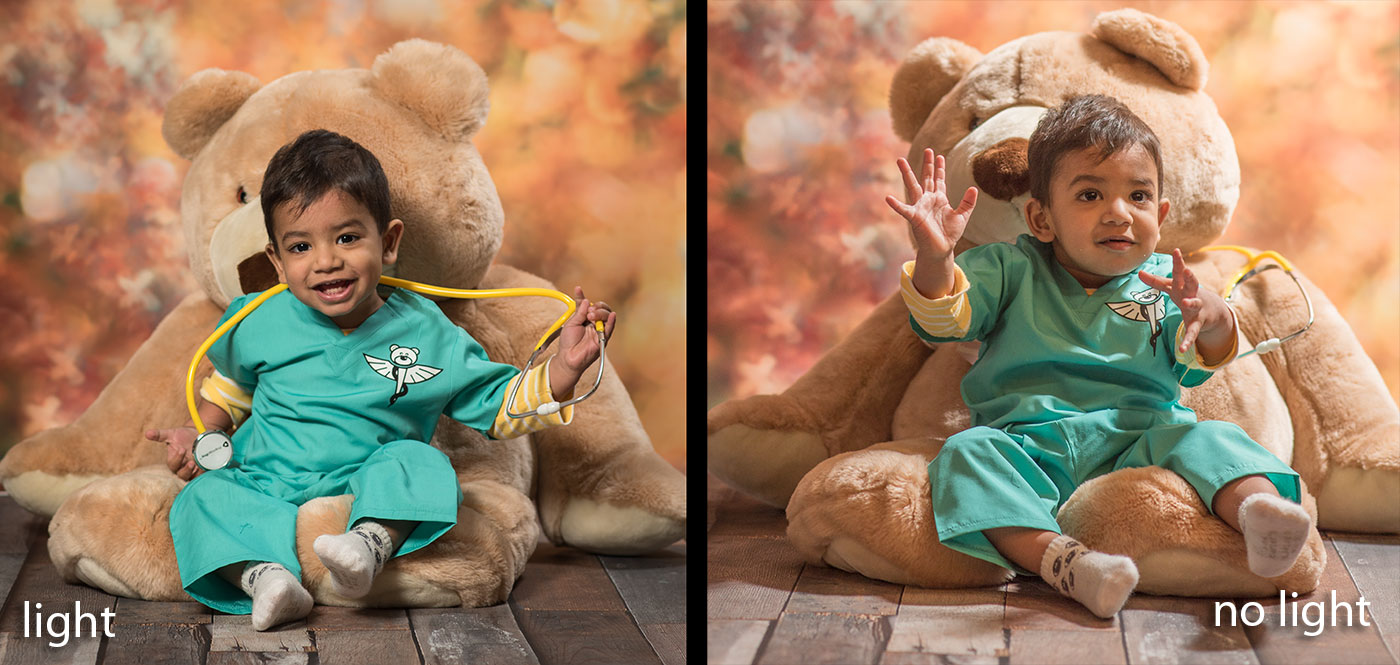
So what headline really should have been for this tip is … get your hands a small flash. Use it. Learn to bounce it off things and control it and you’ll get better results.
Not using a hotshoe flash is one of the biggest reasons new parents are unhappy with the results from their DSLR and stash it on a shelf.
If you give it a try, feel free to share the photo in the comments below!
1 thought on “Three tips, better shot: Your child’s monthly photo”