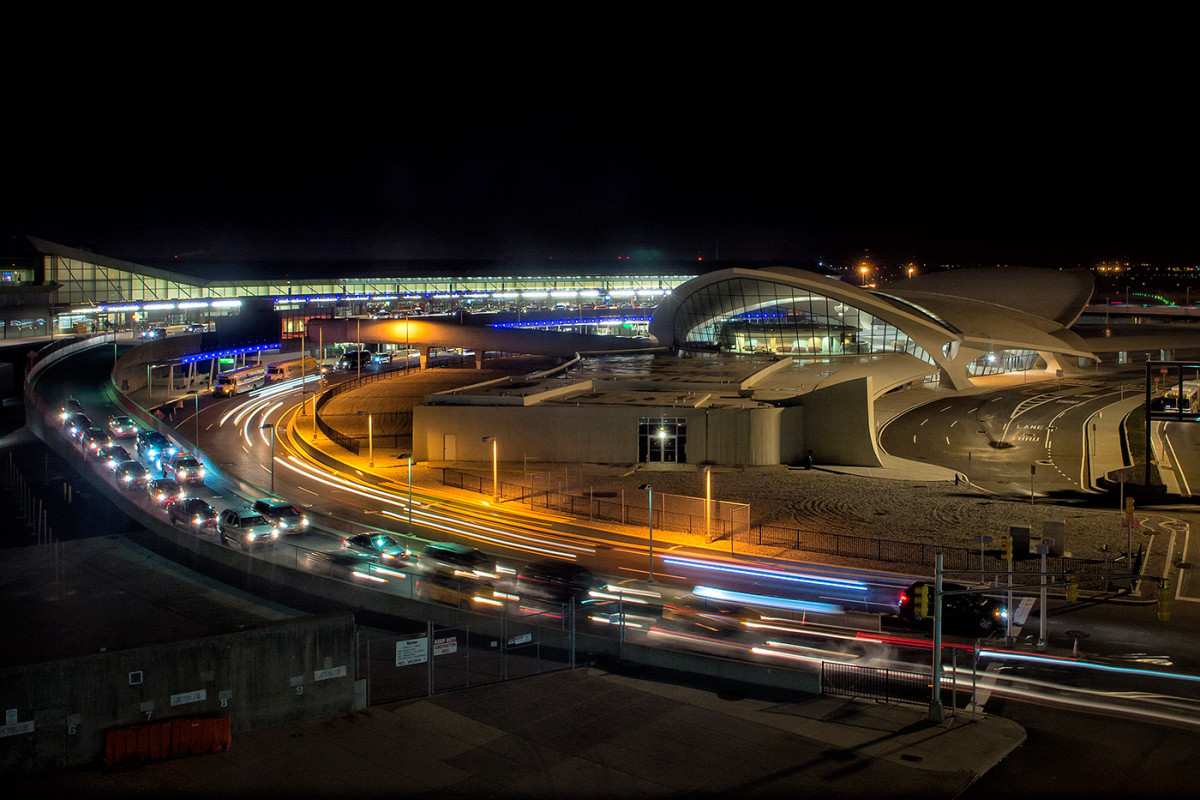
Sometimes, when I’m photographing something iconic, like the old TWA terminal at JFK (that was featured in my 2015 in photos post), I really wish that I could get a clean shot of it. However, this is New York. Traffic is a fact of life. From most angles, there will be cars driving by no matter what time of day.
So how do you make a photo? Try turning that traffic into a graphic element for your photo!
Tip #1: Try it two ways
When you have a lot of traffic in a photo, you can try shooting a couple of different ways – you can drag the shutter or you can use a very fast shutter speed. Trying both will let you choose the best one in editing later – because sometimes a longer exposure isn’t always the right exposure for your tastes.
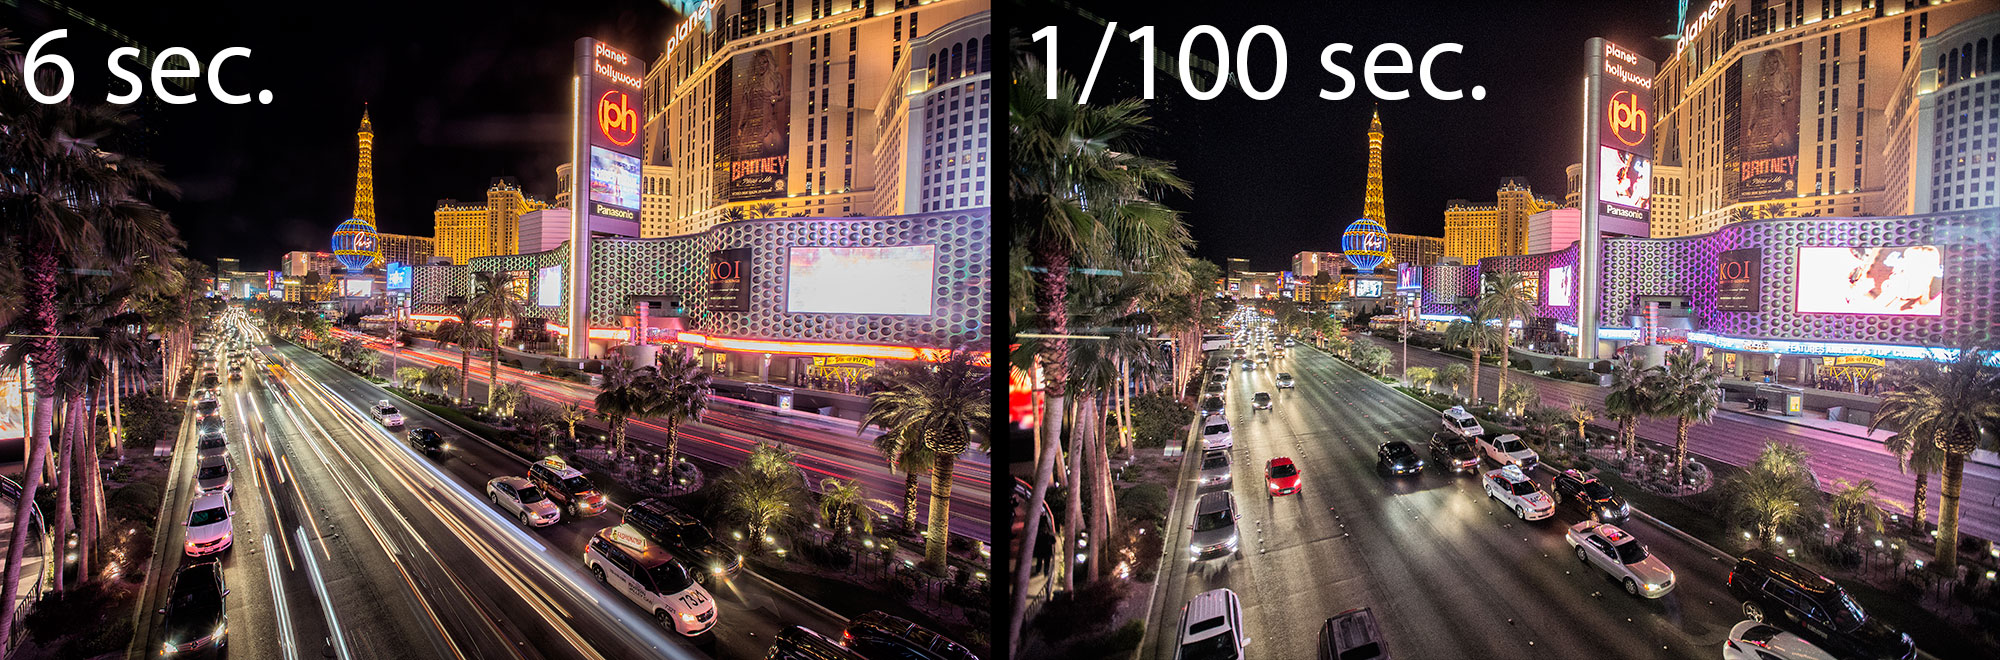
On the left photo, where I kept the shutter open for a full 6 seconds, moving cars turn into streaks of colored light, adding interest to the already chaotic Las Vegas Strip. On the right, a faster shutter speed of 1/100 of a second was used to freeze the motion of the vehicles, yielding a scene more like the eye would expect see it.
I personally like the streaks of light next to the cars stopped in traffic in the left photo. The streaks add a dynamic element of movement to the photo.
Keep on reading for more tips …
Tip #2: Use the self timer
When using a slower shutter speed, even the motion of pressing the shutter release could cause the camera to shake from the force of your finger. This means a blurry photo.

This will mean that you are not physically pressing the button as the camera takes the photo, so any force from your finger will have dissipated by the time the camera gets around to taking the photo for you. Sharp photos, here we come.
Tip #3: Steady yourself
In the case of the Las Vegas photo above, I had a tripod, so shooting a six second photo was easy. What about those times you don’t have a tripod though? Find balance.

Why is steadying the camera in this type of shooting important? Because you want the surroundings to be sharp while the pedestrians (or cars) move, creating artistic motion blur. Without the tripod or something to balance on, everything will be blurry.
Where you can set the camera down on a stationary object, you’ll get much better results than trying to handhold. I balanced on an available countertop to get the TWA terminal photo sharp at that slow an exposure (3.2 seconds).
Bonus tip: use a purse or backpack to place your camera on top of to finagle the exact angle you want. Anything soft and flexible like that will at least give you some options instead of the one you’ll get with a countertop or hard surface.
Of course, a tripod works best, but in those times you can’t carry one, balance on found objects for the best results when dragging the shutter as in these photos here.
Remember to experiment and play with lots of shots at lots of settings. Different shutter speeds will yield different looks, as in all of the photos here.