
“The Decisive Moment” is one of the key basic concepts drilled into a photography student’s head when first starting out. In sports, it’s capturing the peak moment of a play. With your kids, it’s getting that perfect smile and head positioning. In the featured photo for this post, it’s all about getting the right mix of action and expression as these students graduated from high school.
So how do you make sure you capture that moment instead of missing it? Read on for more tips.
Tip #1: Use “continuous shooting” mode
Catching the perfect moment is as much about luck as it is about timing – and being able to take more than one shot effortlessly is key to combining both luck and timing to increase the odds in your favor.
Continuous shooting mode lets you hold down the shutter button so that the camera keeps firing off photos in rapid succession. These days, even entry level cameras have about 4 frames per second, with higher end cameras topping out at 12 or so. That’s a lot of pictures taken in a second.
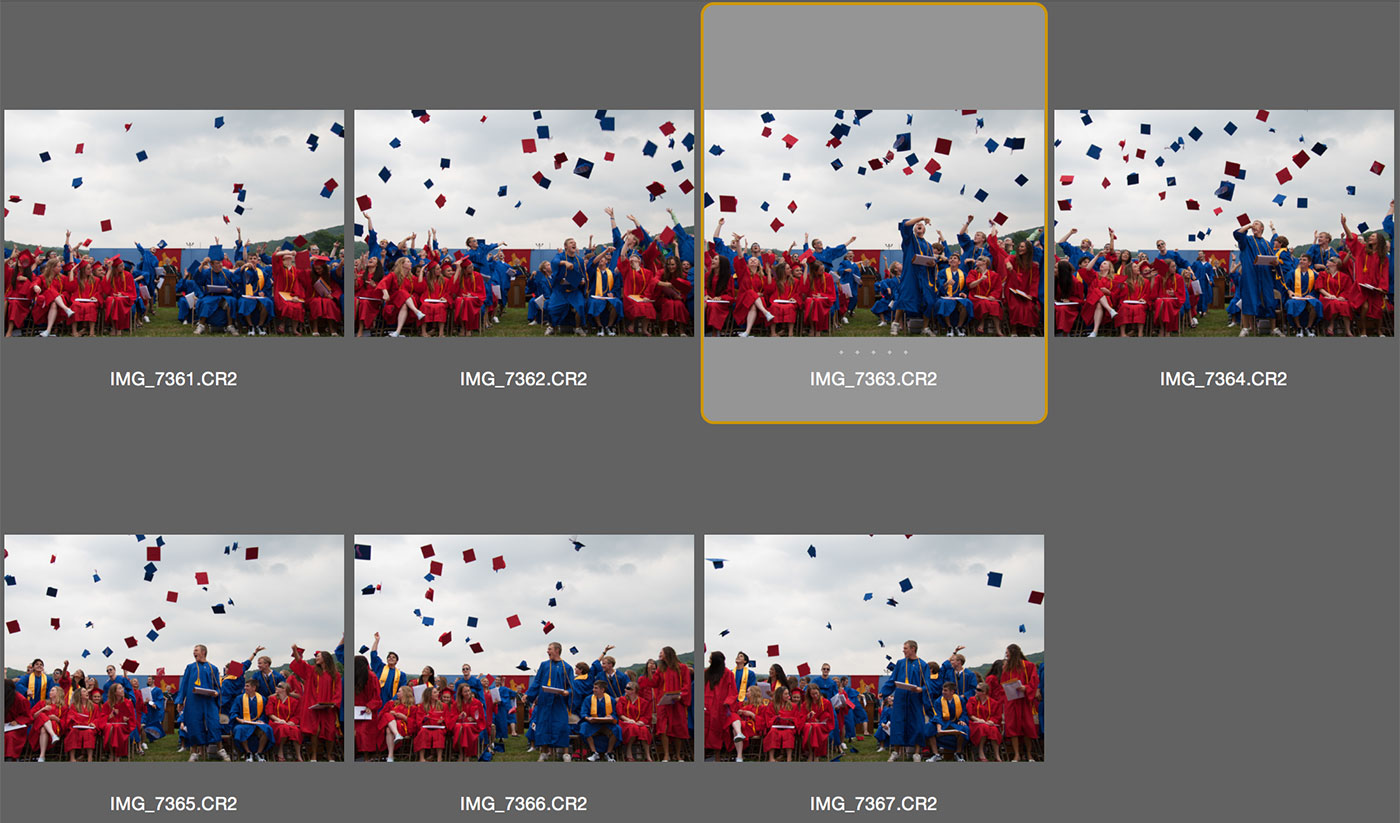
For comparison, the camera used to shoot the featured photo in this post was a Canon Rebel XTI, which is by modern standards a poky 3 frames per second. You can see the entire sequence of shots for that on the right – I got 7 frames off before the moment was over.

You’ll usually find continuous shooting in the camera’s “Drive Mode” menu, commonly an icon of overlapping squares like the picture on the right. Higher end cameras sometimes offer a high speed mode which are the squares with an H next to it.
Once you activate that mode in the camera, it will continue to take photos as long as you hold down the shutter release button, giving you ample opportunity to catch the shot.
Tip #2: Pre-frame and pre-focus your shot
For the graduation photo, I knew I wanted a head-on shot to catch all of the madness, and so I positioned myself at the front of the audience ahead of the cap-throwing. If I had waited until the throwing started to find a position, then I would have missed the action – the whole scene lasted only a few seconds before people picked up and walked away to their families.
This requires some pre-visualization. You have to look at the scene, figure out the angle you want ahead of time, and then position yourself accordingly, even if it means sacrificing a shot or two from other angles.
Pre-focusing is also a good idea – in the pre-autofocus days of sports shooting, photographers would have to figure our where the action was going to happen, then park their focus on the spot they chose until the subject of their photo moved into it.
The technique still works with autofocus – I picked the person in the front row and used the camera’s “one-shot” autofocus mode (sometimes referred to as AF-S or S-AF depending on your camera) which focuses once and doesn’t change unless I let off the shutter button and press it halfway down again. This makes sure that I wasn’t trying to hunt for focus as things happened fast. It will generally work in situations where your subject isn’t moving out of the plane of focus – i.e. they aren’t moving toward or away from you.
Tip #3: Use a fast memory card
Most manufacturers don’t ship a memory card with your camera. It’s a shame, because many people buy a cheap card and then are disappointed when the camera performs slowly or has poor shot-to-shot time. A fast card is a must.
I usually recommend any current Sandisk card branded “Extreme” or the higher-speed Lexar Professional cards (1000x or faster). There are others out there, but these are the brands and speeds I have trusted for my photography over the years.
The reason for a fast card is that after a certain number of shots in continuous mode, the camera will buffer – meaning it has to take time to clear the photographs off the camera and put them onto your card. Faster cards accomplish this in less time, meaning you can get back to shooting faster.

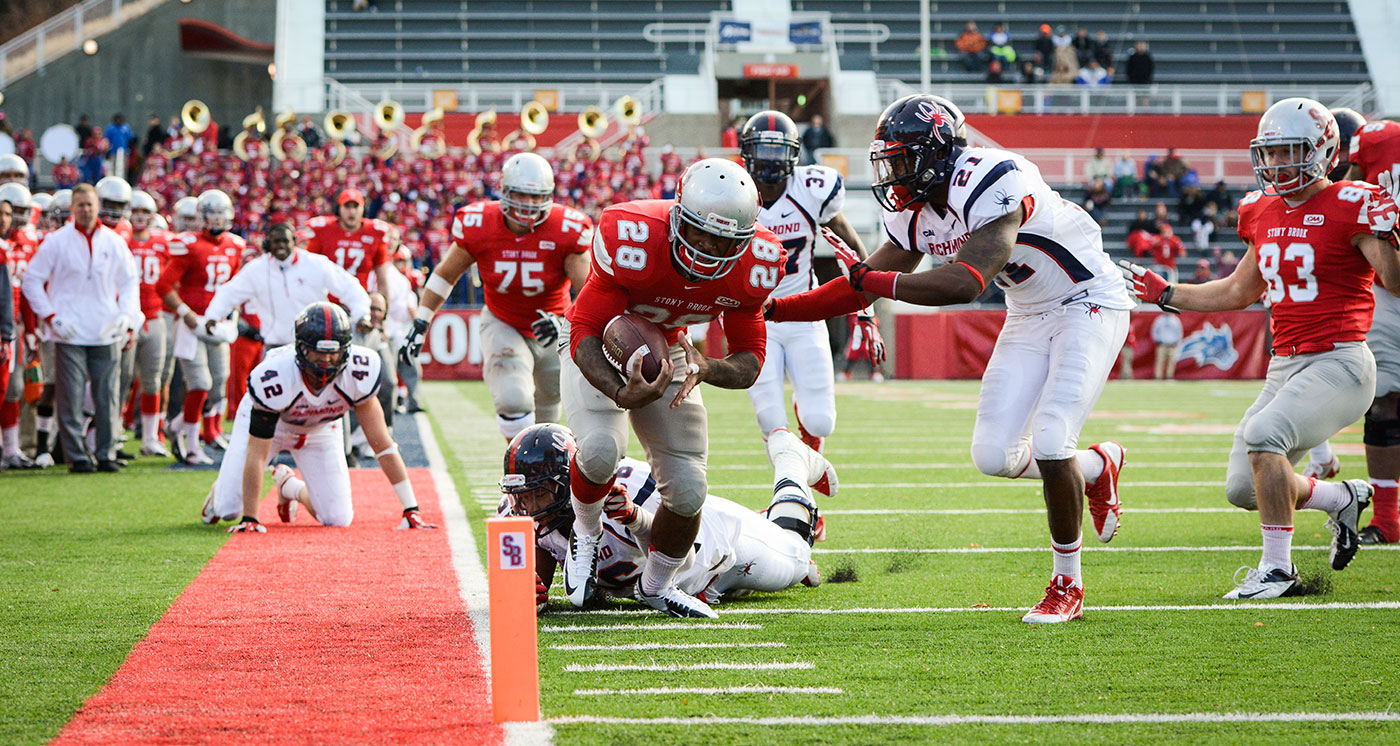
Shooting RAW or JPG quality also makes a difference. Generally speaking you’ll find a camera will perform faster in JPG mode because the files are smaller than RAW files. For sports shooting, this could be key. On the camera used to shoot football above, the buffer in RAW was 6 files, vs. 33 for JPG – the difference between getting the right moment of the play or waiting for the camera to write to the buffer.
If you’re trying out this continuous mode stuff and your camera is hanging for a long time, try a faster card, but also keep in mind that a professional camera can clear a buffer faster than a consumer camera as well.