When I’m out and about, I don’t like to carry around more than a lens or two – this means that sometimes I run into a scene I can’t fit into one shot.
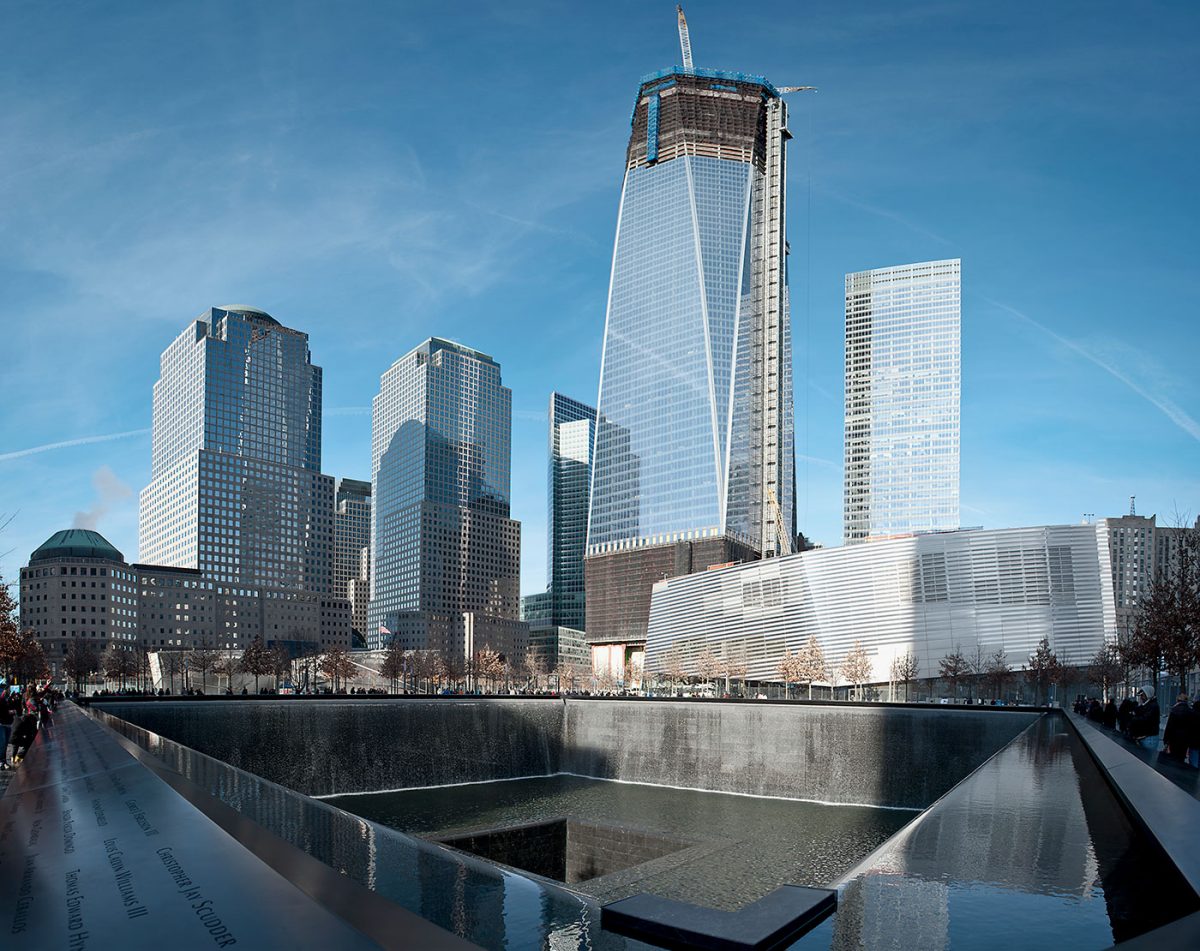
For instance, the 24mm lens I had the day I went to check out the in-progress Freedom Tower in the featured photo of this post was not wide enough to capture the whole thing. And this is the sort of thing that warrants getting the whole picture.
Now many cameras will allow you to do a panoramic in-camera (oddly, my phone allows me to do this, but none of my bulkier DSLR cameras do). But even still, a panoramic won’t work in every situation. This was not a straight up or down, left or right panoramic. This called for a careful stitch of six photos, two columns of three.
How did I accomplish it? Read on for a few tips.
Tip #1: Use manual settings and don’t change your focal length
Consistency is key when shooting multiple photos with the intent to stitch. This means locking down manual settings in your camera and sticking with them for all six shots – this can be difficult if you have very bright and very dark scenes all within the same stitch – so try to make sure you are shooting in an area with consistent lighting throughout the frame you’re making – or accept that dark shadows (parts of it going to black) or blown highlights (parts of it going to white) are going to happen.
Likewise, changing the zoom from shot to shot can throw off the merge, because the perspective will be different. Lock that zoom down, or use a prime lens so then the zoom doesn’t change at all.
Tip #2: Use a tripod, and remember to overlap some parts of the photos
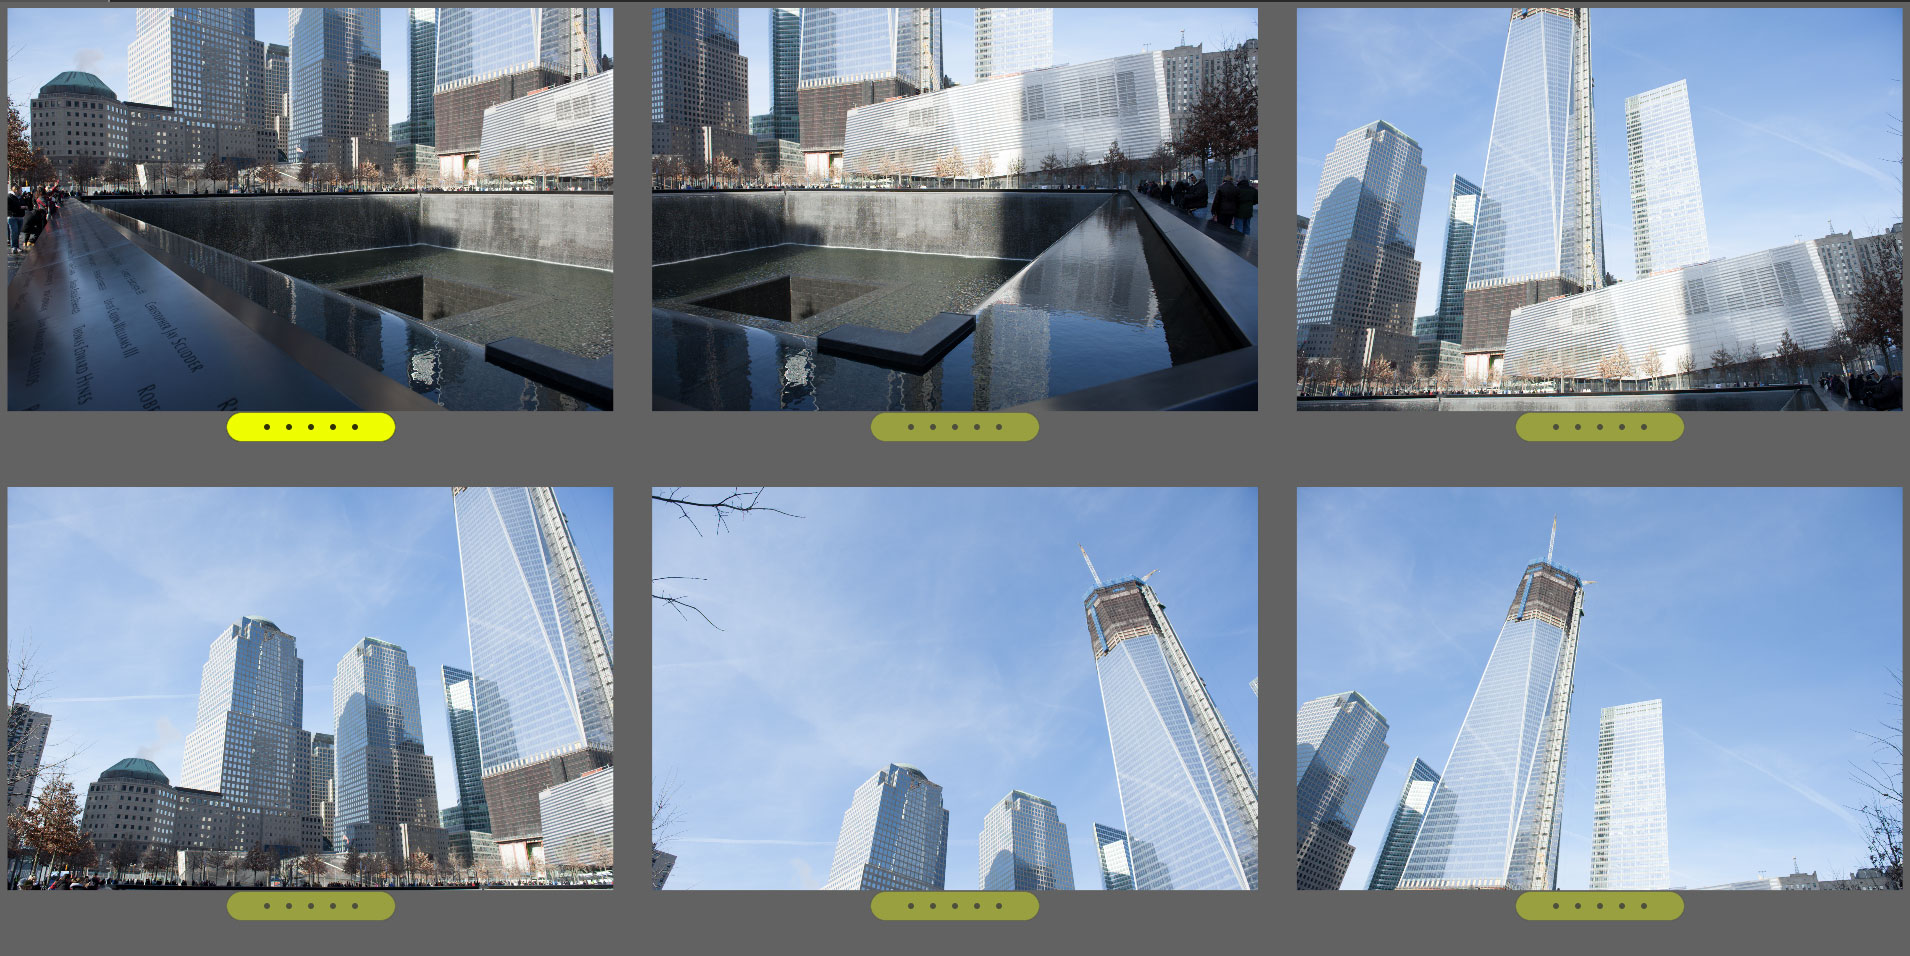
Above are the RAW files for what created the final merged photo featured in this post. Notice the framing and the exposure for each spot, as well as the consistent focal length (zoom).
Tip #3: Do it a few times
You’ll want to leave yourself with a few options, in case the clouds rolled in from one shot to the next and threw off the exposure, or if someone walked in and now part of your photo can’t be edited without an arm coming out of thin air. I generally try create three batches of RAW photos for the composite (so for a 6-shot stitch that’s 18 shots) and I also shoot slightly past where I intend the photo to end so I can cut out the edges if needed for the composition.
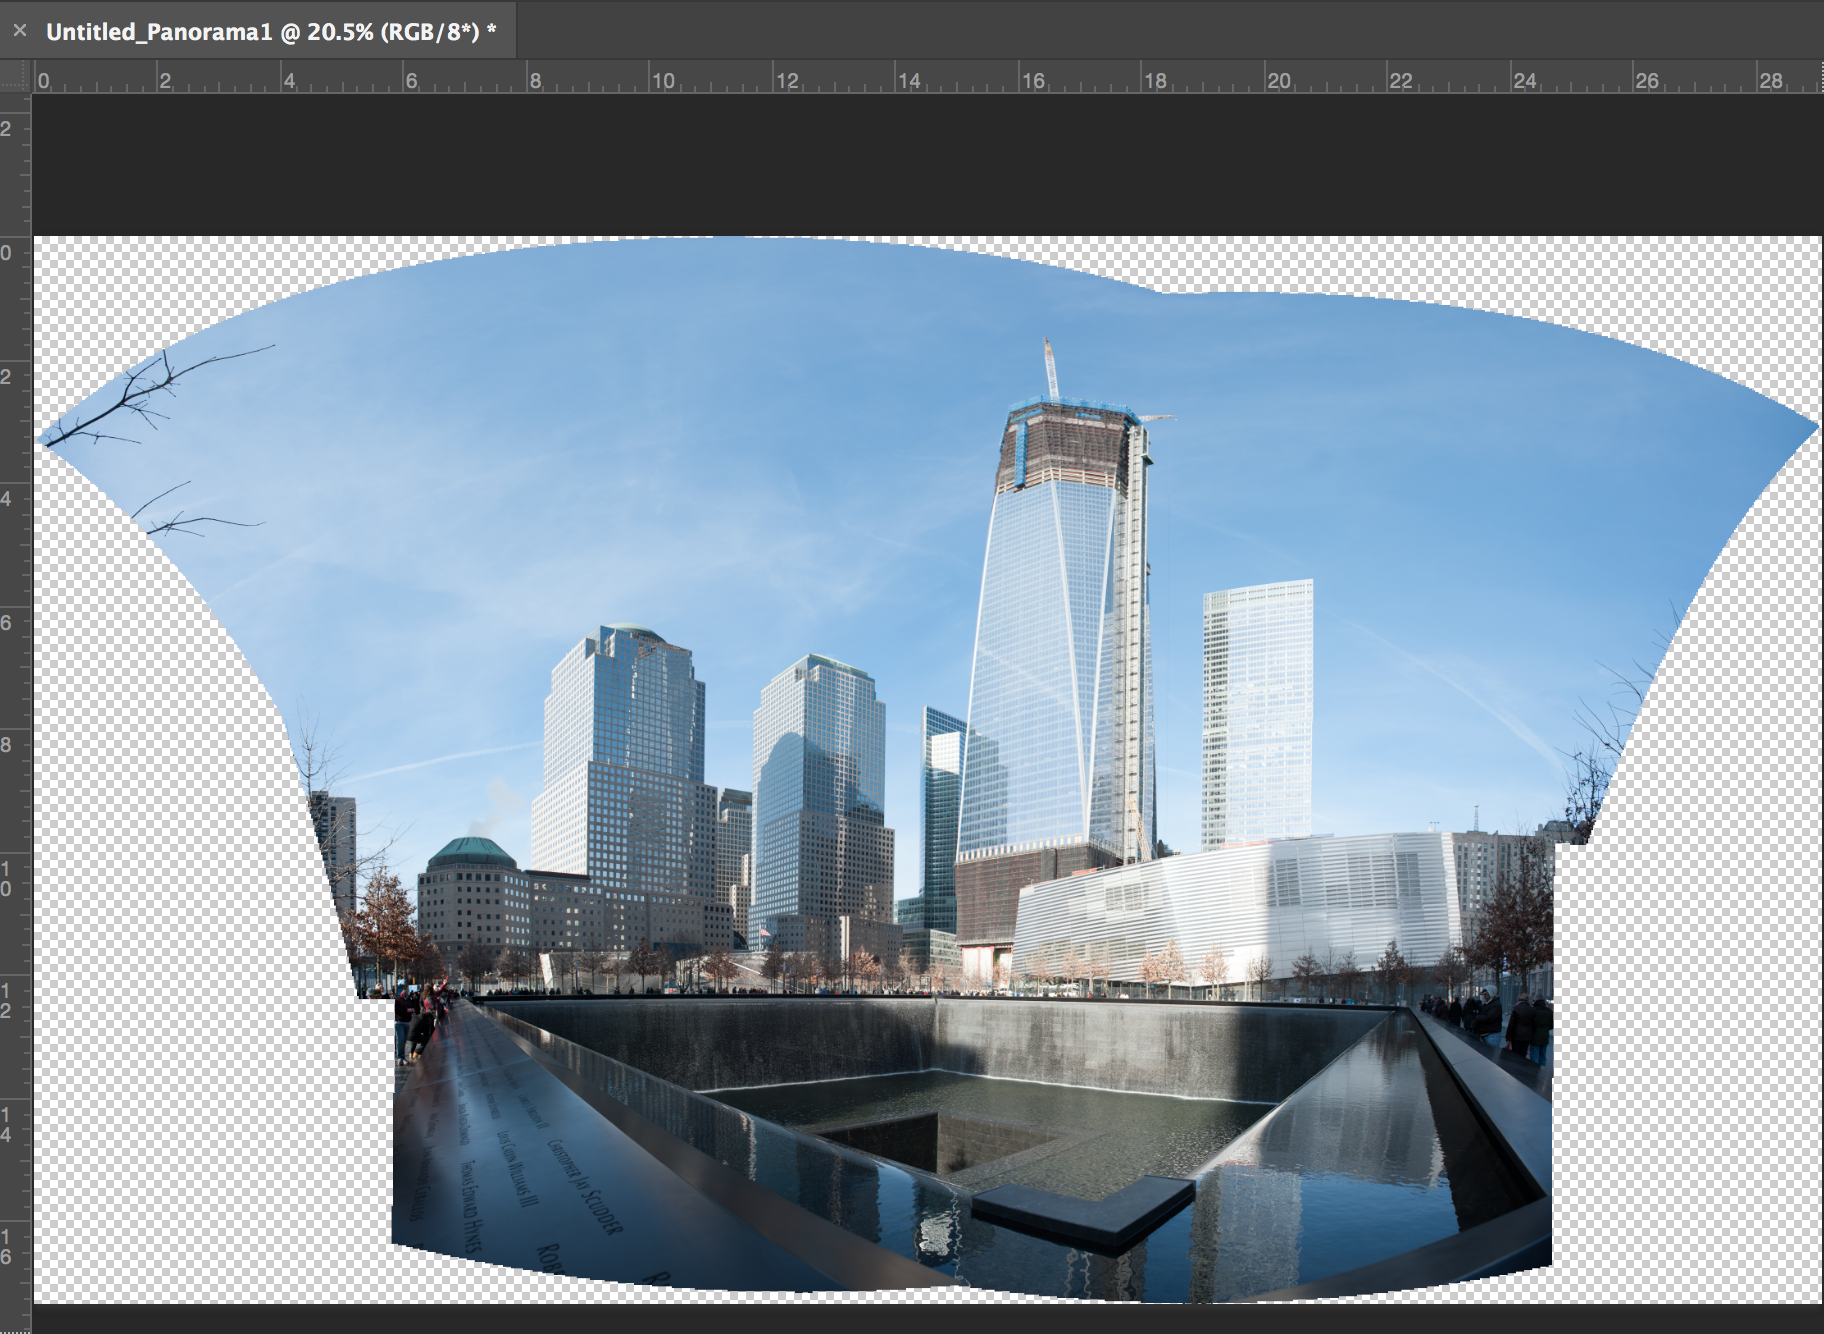
The merge: Photoshop’s Photomerge tool in action
Once you’ve created the raw material using the tips above, open them up in Photoshop (all of them) and then go to File –> Automate –> Photomerge. You’ll see the following dialogue box pop up:

The finished result:
(and one more, just for fun, from Bath, England, from atop the Bath Abbey – way better quality than just using a phone!):
