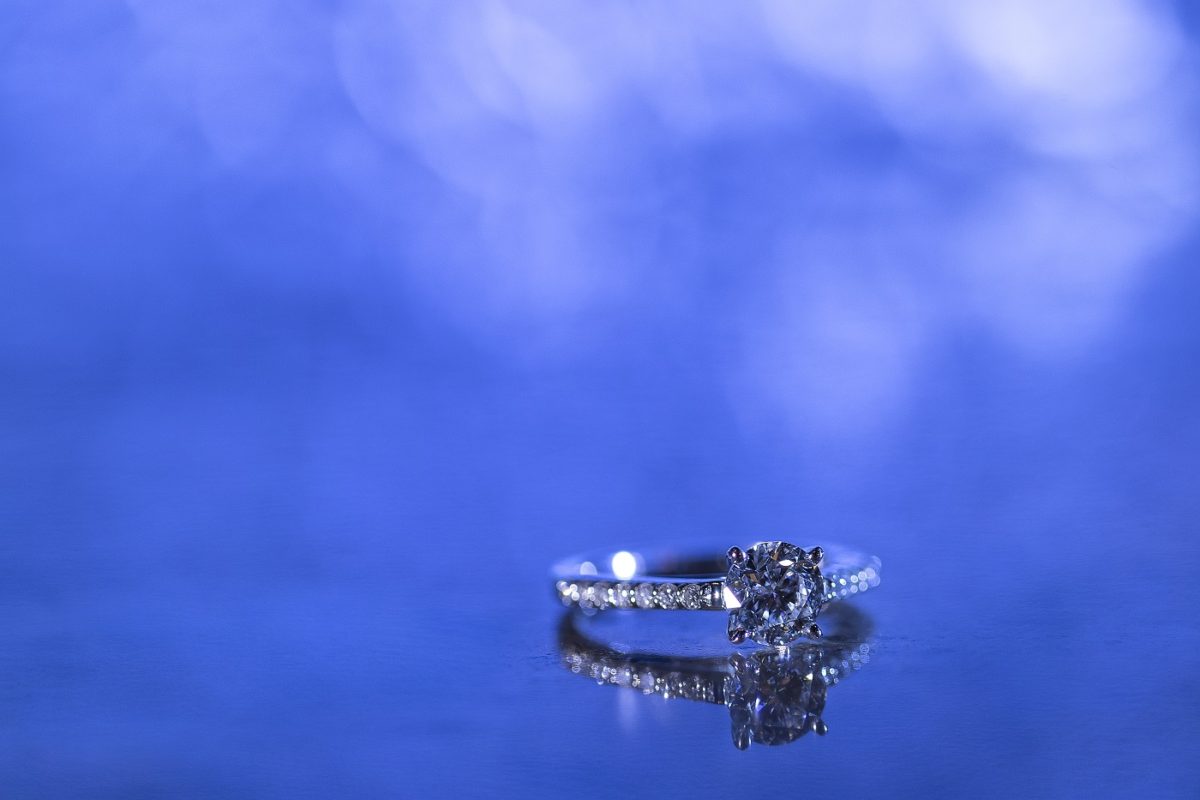
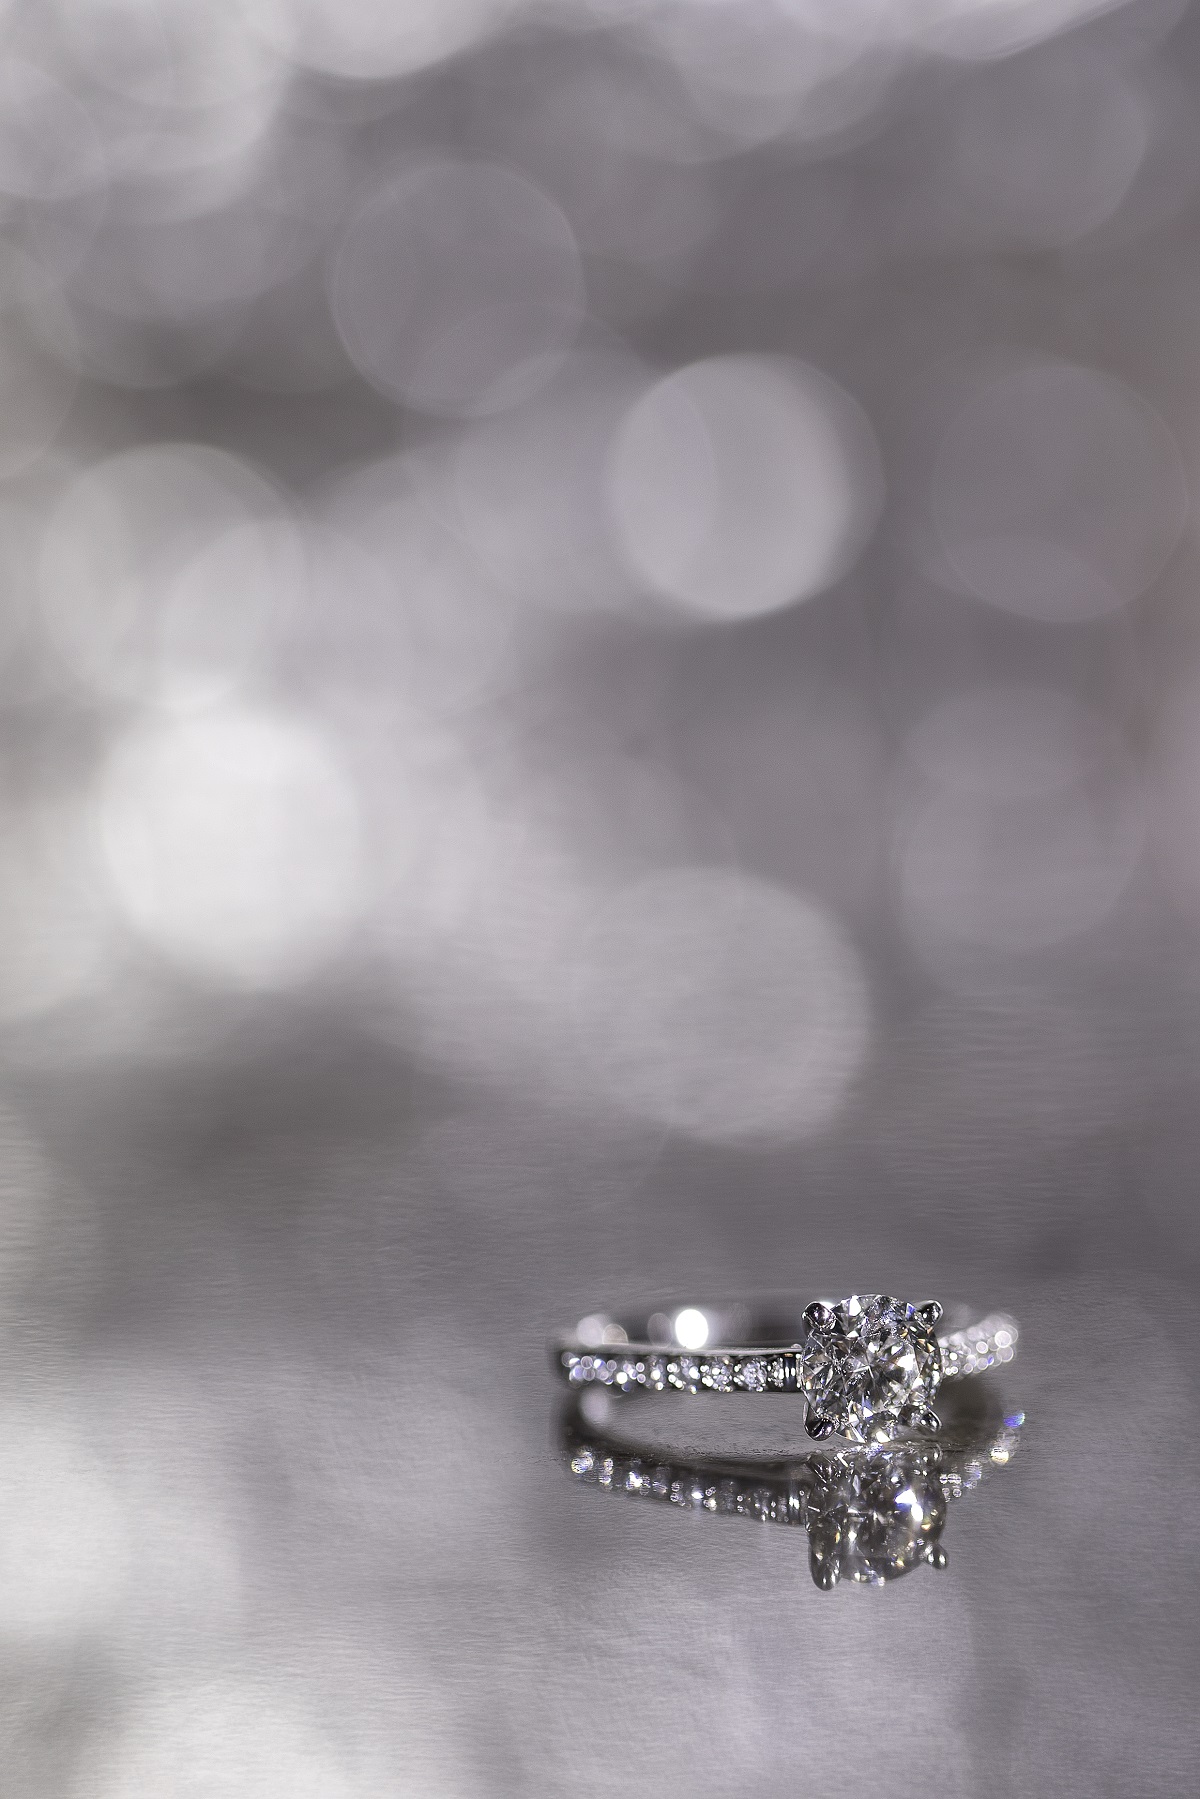
While I can’t take credit for the genesis of this technique (shoutout to Laya Gerlock and his “El Bokeh Wall” writeup in PetaPixel) I did take it and apply it to an engagement ring and took the whole thing out of the studio. The basic thrust of the technique here is that by using a wide aperture lens, a crumpled tin-foil background and some lighting, you can get some interesting results.
Here are some tips on how I made that happen and where I diverged from Laya’s technique just a bit.
Tip #1: Consider LED lighting
At first, I hit the foil and the ring with two separate Canon Speedlite 600EX-RT flashes. In the example from PetaPixel, it worked pretty well given the black walls of the studio and the light modifiers available to the photographer. Not so much in my brother’s kitchen, where the walls and reflective surfaces of the foil and the marble countertop spilled light everywhere, even at the lowest power on the flash. Too much power for what I was doing.
This called for something more subtle, and so I considered LED lights. Once again, I broke out the LumeCubes (I swear, this isn’t an ad for them, I just really like the lights!). While I’m on the subject of LumeCubes, they just launched a Kickstarter campaign for their less expensive Life Lite series of cubes, and these have magnets in them to stick them onto things – if I didn’t already own a bunch of LumeCubes, I’d be all over this, since it’s a safe bet that they will make it to market – they are way over their funding goal already.
But I digress. The LumeCubes at their lowest power was the subtle touch of light the ring and the background needed to bring the scene out. I could also move them around and see the changes to my photo live before I even took the photo, an advantage over using Speedlites.
Tip #2: Finding a reflective surface
In the original PetaPixel post, the Minions pictured had some great reflections below them. In a studio setting, a piece of Plexiglass is a great solution for this. Without the Plexiglass, I had to look for something else.
Enter the marble countertop – great that his kitchen had one of those. Instant reflection.
Make sure, as in product photography, that the countertop is wiped down and clean. When you use a macro shot to get the details out of the ring, you’ll also grab every speck of dust in the picture as well. Get rid of it before you even make the picture.
Tip #3: Shoot in Live View
When using a DSLR (in this case, a Canon EOS-1D X Mark II), there’s often the possibility that a slight miscalibration between the lens and the body can throw off the focus a tiny bit. You might not notice in daily usage, but in detailed macro work, you will.
Shooting a DSLR in Live View, all focusing is done directly from the sensor of the camera, the same sensor that makes the image – no separate unit in between the lens and sensor. This will make our focus much more accurate (though perhaps a bit slower, depending on the camera).
This is one of the biggest advantage of mirrorless cameras – no need to adjust the lenses when the focusing is done directly off the sensor.
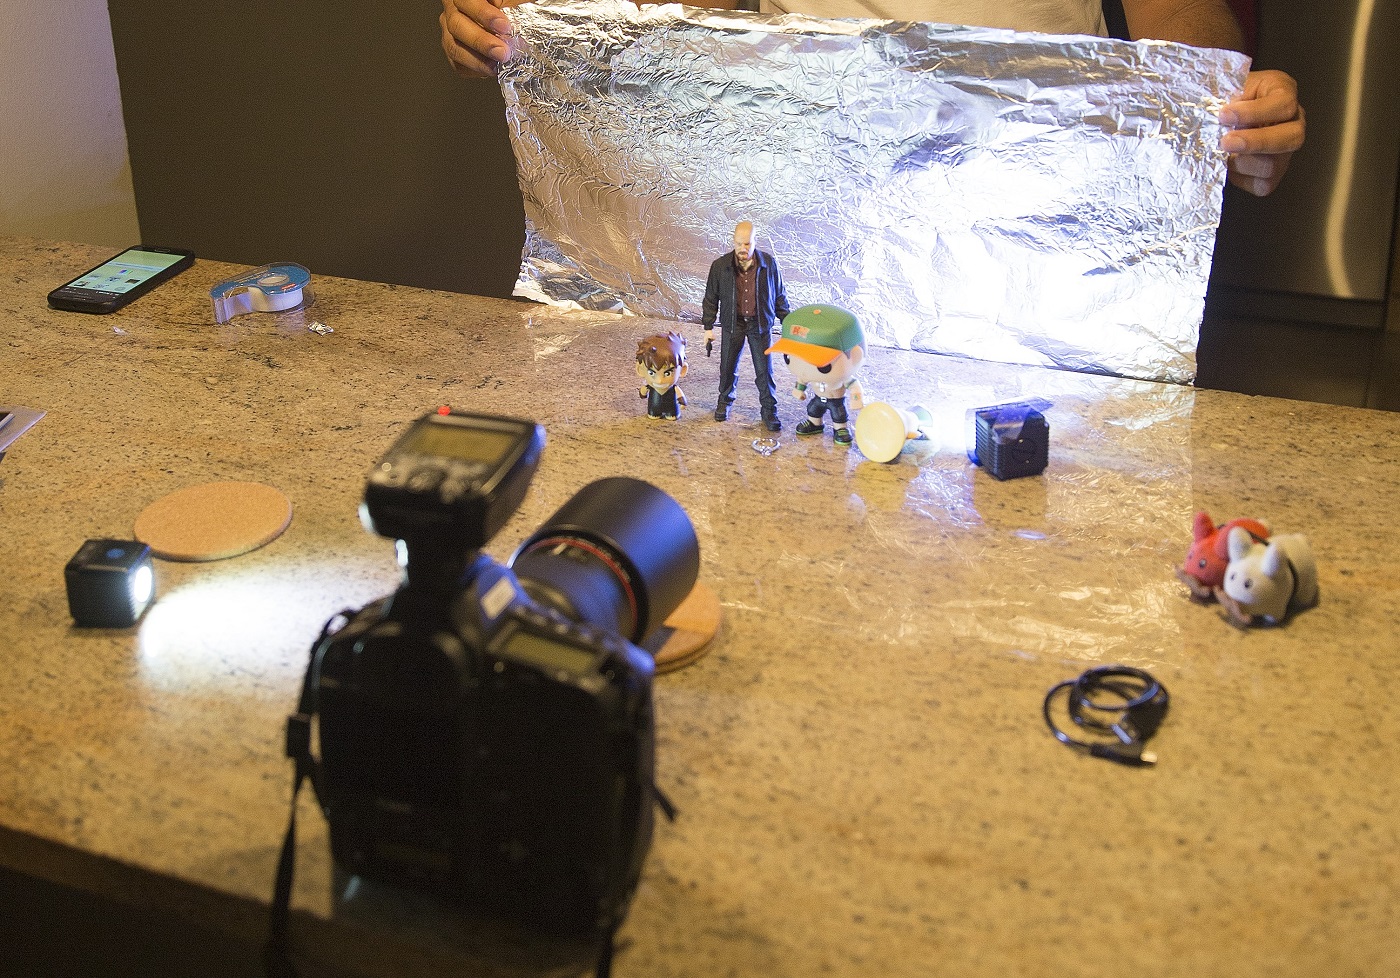
In any case – with those tips out of the way, for those curious about the setup for the photo, here’s a behind-the-scenes look (for a different shot from the same set, but the setup was the same):